 Havalı Tüfekler
 Av Tüfekleri
 Kataloglar
 Ateşli Tüfek Aksesuarlar
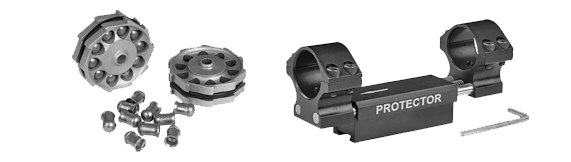 Havalı Tüfek Aksesuarlar
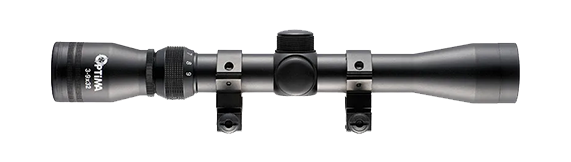 Optikler
If your airgun is not working properly, check these common problems that may get you back up and running before sending your gun in for service work:
- Always check your connecting/mounting hardware!
- Our plunger-driven airguns generate a lot of power and recoil, which can loosen stock bolts with use. ALWAYS check your stock bolts before and after each use to prevent damaging your airgun!
- The rear stock bolt is located at the back of the trigger guard.
- The front stock bolt is located at the fore end of the stock and is mounted horizontally with a locking screw to secure it (SAS equipped models).
- Striker, Edge, AirTact, SuperCharger and some other models have two front stock screws in the fore end of the stock.
- Our plunger-driven airguns generate a lot of power and recoil, which can loosen stock bolts with use. ALWAYS check your stock bolts before and after each use to prevent damaging your airgun!
- “My airgun is not accurate.”
- What pellets are you shooting?
- You must use quality, precision ammunition if you want to achieve quality, precision shot groups. Size, shape, and weight consistency are key to repeatable shots.
- Look closely at your pellets. Pellets with damaged skirts will fly off course, no matter how high their original manufacturing quality.
- Check your shooting technique. “Springers” are not accurate when shot off of rifle sleds or any kind of solid rest. We recommend learning and practicing the “artillery hold” for better results.
- Like any precision shooting, breathing and muscle training are important to achieving precise shot placement.
- Check your breech seal. A missing or damaged breech seal can cause pressure loss and will affect accuracy, as well as power output. If you need help replacing a breech seal, contact the service department in your country.
- Make sure your scope is secure. Check that your scope mounts are tight on the gun, and that the rings are secure on the scope. Plunger-driven airguns should have a scope stop or be used with Weaver type mounts if possible.
- Check your scope. Are you shooting outside of the scope’s intended range? If you’re shooting too close, the scope’s parallax setting may be causing some error. Consider switching to a scope with an Adjustable Objective that will focus where you will be shooting.
- Only use scopes rated for airgun use!
- What pellets are you shooting?
- “My airgun does not cock.”
- Check your trigger adjustments. An out-of-adjustment trigger can prevent the sear from catching. See Understanding the Quattro Trigger for help making adjustments.
- If you have an airgun with dovetail grooves cut into the receiver, check your scope stop screw(s). Using a scope stop screw with out the metal stop plate or using a screw that is too long can interfere with the plunger inside and stop the gun from cocking.
- If you made any adjustments/changes prior to trying to cock your rifle after the last time you used it, undo those adjustments/changes in a safe manner. Remove the pellet from the barrel with a cleaning rod if necessary.
- “My airgun will not fire.”
- Check your trigger adjustments. An out-of-adjustment trigger can prevent the sear from releasing. See Understanding the Quattro Trigger for help making adjustments.
- If you made any adjustments/changes after cocking the gun, prior to trying to fire it, undo those adjustments/changes in a safe manner. Remove the pellet from the barrel with a cleaning rod if necessary.
- The safety is on. Many Hatsan models have an automatic safety feature that sets the safety every time the gun is cocked.
- Check your air pressure. Your PCP airgun may be out of air. Safely remove the pellet from your barrel, recharge the gun, and try again.
- Your Vortex gas piston may be empty or has failed. Contact the service department in your country.
- “My airgun is loud and/or smokes after firing.”
- New plunger-driven airguns may smoke or ‘diesel’ for a few shots when new as assembly lubricants wear off. Smoke may continue to occur up to 200 shots, depending on the particular gun and your environment. DO NOT PLACE ANY LUBRICANT INTO THE COMPRESSION CHAMBER!
- Your breech seal may be damaged or missing. Check the breech area of your gun for a rubber seal, and inspect it for wear/flatness or damage. If you are unsure where to look or what to look for, contact our Service Department for more help.
- Your pellets are traveling at supersonic velocities. Pellets traveling faster than ~1125 FPS will make an audible “crack” as they pass the sound barrier. This is not only loud, but will cause the pellet to become unstable and will dramatically affect precision/accuracy. Choose a heavier pellet or reduce the power output of your airgun if power adjustments are possible.
- “My PCP airgun will not cycle the magazine and/or jams when cycling.”
- Make sure that the magazine catch is in place so that the magazine can rotate around it.
- Check the pellets that you loaded and make sure they are not too long for the magazine. Pellets that are too long and/or protrude when seated will contact the receiver and cause jams.
- Check your breech seal. If it is missing, the groove can catch pellets and cause misalignment – leading to difficulty loading and/or jamming.
- NEVER force the magazine in or out of position, as this can damage the gun’s operating components. Contact the service department in your country.
- “My airgun is difficult to cock.”
- Hatsan plunger-driven airguns are the most powerful in the industry, and may require higher than expected cocking efforts. Your airgun may require up to 50 pounds of force to cock.
- Some Hatsan PCP airguns have very strong/stiff hammer springs that must be set in order to cock. This is a necessary component in the gun’s high power output. Our BT65 Carnivore and Hercules .30, .35, and .45 caliber models will require more effort in order to cock the gun.
- If your gun has recently become more difficult to cock, check cocking linkages for binding. They may require lubrication.
- Check all hardware to make sure nothing has come loose. Loose hardware can cause difficulties cocking.
- If you suspect something may be wrong with your airgun, please contact the service department in your country.
- “My PCP airgun will not fill properly.”
- Make sure that your fill probe is attached correctly. Hatsan’s fill probe uses 1/8″ BSPP threads and must be connected to a matching port. Sealing washers are available from our Service Department if you did not receive one with your rifle.
- DO NOT connect your Hatsan fill probe to a 1/8″ NPT port! This will damage the threads and may cause a hazard to you or those around you.
- If your air cylinder/gun is empty, you will need to either cock your airgun or remove the air cylinder in order to begin the filling process. If the cylinder/gun has been stored empty for a prolonged period of time, it may require a ‘shock’ of air pressure in order to seat the valve so that the reservoir can be filled.
- Check your fill probe’s o-rings. Your Hatsan airgun ships with 4 spare o-rings in the box if you have damaged the originals on the probe.
- If you continue to damage fill probe o-rings, inspect the probe port for burrs.
- Also note that the fill port on our AT44/AT-P cylinder is not perfectly tangential to the cylinder. It is slightly angled to one side.
- Make sure that your fill probe is attached correctly. Hatsan’s fill probe uses 1/8″ BSPP threads and must be connected to a matching port. Sealing washers are available from our Service Department if you did not receive one with your rifle.
Hatsan’s Quattro trigger is one of the most sophisticated airgun triggers on the market today. It has 3 user-adjustable settings via 3 adjustment screws. Starting from the front of the rifle:
- Adjuster #1: Closest screw to the muzzle. This screw sets the initial depth of sear engagement, or overall trigger travel.
- Adjuster #2: Middle screw. This screw sets the point at which your 2nd stage engages.
- Adjuster #3: Rear screw. This screw adjusts the final pull weight of the trigger. DO NOT over-adjust this screw, as there must be enough spring pressure to set the sear when cocking your gun!
Here are some adjustment pointers for those who wish to fine tune your triggers. Make only small adjustments to one screw at a time so that you can easily reset if you make a mistake and over-adjust your trigger.
*Exercise caution when making trigger adjustments.* It is a good practice to take notes and/or photos of your initial working trigger settings so that you can return to that point should you need to start over.
- Break-Barrel and Under-Lever Airguns
- Adjuster #1 is a cap-head screw and is best left all the way in (clockwise) for best trigger feel.
- Adjuster #2 is a cap-head screw and can be set to the shooter’s preference, but do not set more than 1.5 turns out or the gun may not fire. If you experience a failure to fire, re-set this screw all the way in and start over with your adjustments.
- Adjuster #3 is a set or “grub” screw and is adjusted with a 1.5mm hex key. With approximately 2 threads exposed, it is at its lightest setting. Unscrewing it beyond this does not lighten the trigger pull any further, and may interfere with the trigger blade if it is too far out.
- If you need help, please contact our Customer Service Department for assistance.
- PCP (Pre-Charged Pneumatic)
- Adjuster #1 can be turned clockwise to reduce initial sear engagement (overall trigger travel); however, it is possible to adjust this to a point at which the sear will not set or will not reliably remain set. If you experience a failure to cock or a failure to remain cocked, turn this adjuster counter-clockwise ¼ turn and test again.
- Adjuster #2 will set the engagement point for your 2nd stage. Clockwise will move the engagement point further forward, and can be set to a point that eliminates the 2-stage function of the trigger. Counter-clockwise will move the engagement point further rearward, however, it can be adjusted to a point at which the sear cannot be disengaged. If you experience a failure to fire, turn this adjuster clockwise ¼ turn and test again.
- Adjuster #3 will adjust the trigger pull weight, and can help you dial your trigger down to a nice light pull. Counter-clockwise will reduce pull force, however, there must be enough spring pressure to set the sear when cocking the gun. If your gun does not cock after adjusting this screw, turn it ¼ turn clockwise and test again.
- If you need help, please contact our Customer Service Department for assistance.
It is extremely important that you exercise caution when making trigger adjustments. Always make and test adjustments in a safe environment and point your airgun in a safe direction. Neither Hatsan nor HatsanUSA are responsible for errors made while adjusting your trigger.
The effective range of your airgun depends on four major factors: 1) power plant / gun type, 2) power output, 3) pellet choice / precision, and 4) shooter skill.
- Your gun’s power plant has an impact on how well you will be able to shoot at longer distances. Traditional plunger-driven “springers” tend to generate quite a bit of recoil and require more skill to master, especially as power and distance increase. Gas piston and other dampening technologies have helped reduce some of the vibrations generated during the firing cycle, but there is still bi-directional recoil to consider when shooting. PCP (Precharged Pneumatic) guns have little to no recoil, and thus, tend to be more precise by design.
- Your gun’s power output will affect its effective range. Also, your intended purpose plays into this as well. A 12 Ft.-Lb field target rifle is very effective at hitting a 1.5” target at 55 yards, however, it isn’t necessarily a 55-yard hunting rifle. The ultimate effective range will be the furthest distance your pellet can precisely impact and maintain the minimum required energy for the target you are shooting.
- Your choice of pellet is also important in determining the effective range of your airgun. #1 is finding a pellet that is accurate / precise. You need to be able to hit your target with consistency. If you plan to hunt with your airgun, use quality pellets designed for precision hunting. PLEASE DO NOT GO HUNTING WITH INEXPENSIVE BULK AMMO!! Ballistics also plays a part in effective range. Some pellet shapes are more aerodynamic and allow longer range shots. Heavier pellets tend to be more accurate but require more power to shoot long distances.
- Ultimately, your skill will be the most important factor in determining your airgun’s effective range. If you are shooting a plunger-driven gun, practice the “artillery hold” – and practice a lot. Consistency is key when it comes to airguns and how you hold and shoot them. Most shooters find a limit of around 20-30 yards for hunting consistently, however, some accurately hunt beyond 50 yards with “springers”. It all comes down to how well you and your rifle work together. PCP rifles, are altogether different. Their higher power and lack of recoil allow for 100+ yard precision from even moderately-skilled shooters.
To discover you and your rifle’s effective range, take a target and draw a 1” circle. You can trace a quarter, which is pretty close. Now set your target up at 10 yards and fire 5 shots at that circle. If you get all 5 shots inside the circle, you can check 10 yards off the list as an effective range. Now move your target back in 5-10 yard increments and repeat the test. When you can no longer keep all 5 shots in the circle, you’ve exceeded your particular combination’s maximum effective range. Consider testing different ammunition or fine-tuning your technique. If you learn proper technique and continue to practice, you can increase your effective range and get more out of your airgun.
Making trigger adjustments can be challenging if you’ve never done it before. The key is to take your time and only make very small adjustments, testing each change as you go. In this video I’ll walk you through the basics of adjusting the Quattro Trigger on Hatsan Spring and Vortex powered airguns as well as Hatsan PCP airguns
PCP Airguns represent the top of the airgun food chain. They are very powerful, accurate, and very easy to shoot. In this video we will look at what steps are required to get your new AT44 Quiet Energy airgun all setup to take your first shots, and what you need to know to help ensure trouble free operation. Before you watch this video however, be sure to review the videos on how to fill your PCP Airgun. If you have any questions on operation and maintenance that are not covered in this video, please contact the service department in your country.
While using a Hatsan Hand pump may be the simplest method to fill your Hatsan PCP airgun, it can take a lot of work, especially if you are a volume shooter. There are other ways to more quickly charge your Hatsan Air Cylinder and one of the easiest is by using a SCUBA tank and the Hatsan Fill Kit. But, knowing what you need to make sure it works correctly can be a challenge. In this video we discuss different types of tank valves and how to make them work with the Hatsan SCUBA Fill Kit. Once you have the basics down, it is smooth sailing from there.
PCP airguns do not need to be a mystery. In fact, they are very easy to shoot and fill, so long you understand the basics. They provide airgunners the most powerful, most accurate, are the easiest to shoot, especially for firearms folks looking to add airguns to their shooting regimen. In this video we discuss the most direct fill method, i.e. using a simple hand pump. The new Hatsan hand pump takes fewer strokes and not includes particle and moisture traps in the handles. If you’ve ever wanted to know how easy it was to fill up a PCP video, here’s your chance.
Shooting a powerful spring or gas ram powered airgun requires a special technique called the Artillery Hold. In this video we explain why it’s so important and talk about the basics of the technique.